Tuesday, August 30, 2011

What's for Dinner? Linguine with White Clam Sauce!

I don't know what it is that I love about linguine with white clam sauce.  I always order it at Italian restaurants.  I just like the garlicky-winey-clammy flavor (haha, that sounds kinda gross).  I have made this dish with fresh clams and it is great, but quite honestly, after you get done cleaning, shucking and chopping them...it doesn't taste THAT much different than using canned clams (some of you may want to strangle me for this, but I'm just being honest).  If you want to use fresh clams, by all means, do it!  But the rest of us that have to have dinner done quick will use canned!  Serve with a quick side salad. I hope you enjoy this easy meal!

Linguine with White Clam Sauce
Serves 4

9 oz fresh linguine or 1/2 box dried
2 TBSP olive oil
2 TBSP butter, divided
1 large onion, finely diced
3 cloves garlic, minced
2 small cans minced baby clams (juice reserved)
1 can whole baby clams (drained)
1/2 cup white wine
1 heaping tsp dried oregano
1/4 cup fresh parsley, minced
crushed red pepper, to taste
fresh cracked black pepper, to taste
salt, to taste
grated cheese

In a pot, bring water to a boil.  Add linguine and boil for the appropriate amount of time.  Drain, add 1 TBSP of butter, toss and set aside.

In a large skillet, heat oil and 1 TBSP butter.  Add onion and saute until translucent (about 3-4 minutes). Add garlic and saute 1 minute more.  Add clam juice and wine and simmer for another 2-3 minutes.  Add clams and herbs.  Cook until warmed through.  Add pasta and toss to coat.  Serve and top with grated cheese.  Enjoy!

Download PDF of Recipe

Monday, August 29, 2011

What's for Sides? Spanish Rice!

**First of all, I must start by correcting an error in my last post.  Teriyaki is Japanese, not Chinese, as one of my dear Foodie Gurus pointed out.  She is, of course, correct, so if you are using it in a Japanese-style dish it is Teriyaki Sauce.  If you are using it for a Chinese-style dish, we'll call it Stir-fry Sauce!  There...that settles that!  :)

Tonight I was in a rice mood.  Not sure why but as I was thinking about what kind of rice, a dish came back to me that sounded good.  My roomate in college's mom used to make a version of Spanish rice and she would bring a huge batch of it down with her any time she would visit.  We would devour it like vultures (pretty much went for anything that didn't come from the cafeteria).  What was interesting about it is that it has green olives in it.  I didn't think I would like it, but it gives it a unique flavor. 

Now this rice, to me, tastes very Creole-esque.  But I guess Creole cooking is partially influenced by the Spanish. The saffron gives it more of a Spanish flair, along with the spanish olives.  If you don't have saffron, you can omit it.  If you do, maybe use the Mahatma Yellow Saffron rice in the store (just adjust the liquid to what it calls for on the packet).  If you hate olives (a lot of people I know, do), then you can omit those as well, but I do think they give this dish a little something extra.

I served this along marinated chicken and veggie shish-kabobs, but you could do just regular grilled chicken.  The rice tastes great with the chicken kind of mixed in.  I hope you enjoy!

Spanish Rice
Serves 4


2 TBSP olive oil
1/2 onion, finely diced
1/2 green bell pepper, finely diced
1/2 red bell pepper, finely diced
2 stalks celery, finely diced
3 cloves garlic, minced
1 tsp chili powder
1 1/2 cups arborio rice (or white rice...adjust fluid accordingly)
3 cups chicken broth
1 large pinch saffron
1 can diced tomato, with juice
1/3 cup sliced Spanish olives
salt and pepper to taste

In large pot, heat olive oil.  Add onion, peppers and celery and saute until they begin to soften, about 3-4 minutes.  Add garlic and heat for one minute more.  Add chili powder and stir to combine.  Add rice and cook for one minute more.  Add in 2.5 cups broth and stir.  Add in saffron. Simmer, covered, on low for about 10 minutes, stirring every several minutes. Add in tomatoes and juice and return cover.  Cook another 10 minutes or until rice is fluffy and has absorbed the liquid.  If more liquid is needed, add it.  Add in olives and stir.  Season with salt and pepper.  Serve and enjoy!

Download PDF of Recipe

Friday, August 26, 2011

What's for Dinner? Hurricane Teriyaki!

The start of the hurricane, at high tide
As I write this, we are listening to the pouring rain and whistling wind of big, bad, Hurricane Irene.  Well, she's as least big. The jury is still out on whether she is bad...I guess we'll know in the morning. 

So since we were trapped in the house tonight, we thought we should make dinner with some things from the freezer, just in case we lose power and have to pitch some of it.  Our friends Brian and Laura are here riding out the storm with us (after the owner of the beach house they were to rent for the weekend called to tell them he was giving them their money back and going down to board up the house).  We had some filet tips in the freezer and (RANDOM) egg rolls and potstickers.   So, Sully thought of steak teriyaki and creating a Chinese feast.  We were kind of thinking the power was going to go out at any minute, so we got down to business.  We have always had trouble making a good brown sauce for Chinese food.  It just never comes out as flavorful or as good as when you get it from a good Chinese place (probably the lack of MSG-ha!).  But we found this recipe and adapted it a little bit and it came out so good! 

We didn't have too much (that is perishable) in the house, but we had some green beans, so that had to do (it's fun to make something good out of nothing...Sully's a pro).  This sauce would be great with chicken and/or beef with broccoli and/or any kind of veggie mix.  Jasmine rice was also really good with it because it was fluffy and sticky and it was a great base for the sauce.  I hope you try it...without the hurricane.  Enjoy!

Hurricane Teriyaki Sauce
Serves 4

2/3 cup low sodium soy sauce
1 cup chicken broth
1/3 cup rice wine vinegar
3 tablespoons sugar
1 tbsp toasted sesame oil
1/4 tsp pepper
2 tbsp corn starch
1/4 cup water
2 tbsp canola or peanut oil
1 tbsp minced garlic
1 tbsp minced ginger (keep your peeled ginger in the freezer and grate frozen piece...makes it easy!)

Combine soy, broth, vingegar, sugar, sesame oil and pepper in a small bowl.

Dissolve cornstarch in water.

Heat saucepan over high heat and add canola oil. Add garlic and ginger and cook until fragrant, about 1 minute.  Add soy sauce mixture and bring to a boil. Reduce heat to medium low and cook for 1 minute.  Add cornstarch mixture and cook until the sauce thickens.  If sauce gets too thick, add more broth or water.

Monday, August 22, 2011

What's for Dinner? Chicken Marsala!

Sorry I fell off the wagon last week.  Not sure why, but we just didn't cook a lot...we had a lot going on!  But I'm back, baby.  Tonight, I had two containers of mushrooms in the fridge I wanted to use (I tend to buy multiples of things because I forget that I have already bought them...anyone sympathize?). Chicken Marsala is a really easy and yummy dish that was perfect.  It really only takes about 15 minutes to make.  Works for me!  You can use a variety of mushrooms, to fancy it up, or just use your standard whites.  I served it with green beans sauteed with shallots and we had a great, easy meal.  Give it a try. Enjoy!

Chicken Marsala
Serves 4
  • 1/2 cup flour
  • 1/2 tsp dried (or fresh) thyme
  • 1/2 tsp dried oregano
  • 1/4 tsp cayenne pepper
  • 1 tsp salt
  • 1 tsp pepper
  • 1-1.25 lb chicken cutlets (I buy the already pounded cutlets, but you can buy regular breasts and pound them out thin between two sheets of plastic wrap)
  • 2 TBSP olive oil
  • 2 TBSP butter (I use Brummel & Brown spread)
  • 2, 8 oz pkg sliced mushrooms (use any varieties you like)
  • 2 garlic cloves, minced
  • 1 cup chicken broth
  • 3/4 cup Marsala wine
  • salt and pepper to taste
  • 1/2 lb angel hair pasta (or any cut you like)

In a shallow bowl, add flour and spices and mix together.  Dredge chicken cutlets in flour mixture until well coated.  Set aside.  In a large frying pan, heat 1 TBSP oil and 1 TBSP butter until hot.  Add half chicken cutlets and saute on one side, about 3-4 minutes until golden.  Flip chicken and saute about 2 minutes more.  Reserve to plate.  Add the remaining oil and butter and chicken and repeat steps. 

In a pot, bring water to boil and add pasta.  Cook according to directions. Drain and set aside.

After chicken is done and removed from the pan, add in mushrooms.  Saute until they start to get tender.  Add garlic and saute one minute more.  From the remaining flour in bowl, sprinkle 2-3 tablespoons over mushrooms and stir to coat.  Cook 1 minute more. Add chicken broth and Marsala wine and let simmer until it begins to thicken.  Add chicken back to pan and simmer, about 5 minutes more until sauce is thick (if it gets too thick, add more broth).  Season with salt and pepper. Serve over pasta and enjoy!

Download PDF of Recipe

Wednesday, August 17, 2011

What's for Lunch? Salmon Salad!

If you are anything like me, when you cook fish and you have any leftover, it usually goes in the trash a few days later. Nothing is worse than reheated fish.  Not only does it smell up the house, but it dries out and tastes nasty.  Well, here is a solution.  Make fish salad out of it.  Sounds weird, I know, but it is good! There is a place down in Southport, NC that makes these amazing Grouper Salad Sandwiches.  And a restaurant that I like in Cary makes really good Salmon Salad.  I took this cue from them with leftover grilled salmon that I had from the other night.  It is easy to make, makes a good lunch the next day and makes you feel good that you used that leftover fish instead of pitching it. 

Make this recipe with really any fish you have left over.  Just make sure your fish is cooked through (if you like your grilled fish underdone, keep what you think you won't eat on the grill for a few more minutes).  Depending on the fish you have, use the same dressing base, just adjust the other ingredients to those that go well with that fish--be creative (celery, pickle relish, roasted red peppers, etc.).  Serve with pita points or crackers and enjoy!

Salmon Salad
Serves 4
  • 2 TBSP creole (or whole grain) mustard
  • 1/3 cup mayonnaise (I use light Olive Oil mayo)
  • 2 TBSP white wine vinegar
  • 3/4-1 lb leftover salmon, flaked (make sure any bones are removed!)
  • 1/4 cup finely diced red onion
  • 1/4 cup frozen peas, defrosted (or fresh, if you have them)
  • 2 hard boiled eggs, chopped
  • salt and pepper to taste

In a small bowl, combine mustard, mayo and vinegar.

In a large bowl, add fish.  onion, peas and eggs.  Carefully combine.  Fold in dressing mixture until well-coated.  Season with salt and pepper.  Enjoy.

Download PDF of Recipe

Thursday, August 11, 2011

What's for Dinner? Chicken Fried Steak!

I decided to cook my husband's favorite dinner tonight in celebration!  Of what you ask?  Something REALLY important.  Like, epic. The first NFL football game of the season, of course (so what if it is preseason?)!  We are really into football here, especially the NFL.  Sully is still celebrating his beloved New Orleans Saints Superbowl win two years ago!  He loves football and I shudder to think of what it would have been like around here, had there been a lockout.  So, indeed, we needed a celebratory dinner!  Chicken Fried Steak is one of his favorite splurges.  Yes, it is not the best for you, that's why we only eat it once in a blue moon, but it is delicious and relatively easy to make.  Ok, so he ended up cooking his "surprise" dinner himself (while I made sure the baby didn't get splashed with hot oil)... but he's so good at it!  If you ever crave comfort food, this is a keeper.  Give it a try and GEAUX SAINTS!


New Orleans boy to the core!
Chicken Fried Steak
Serves 4

1 1/4 cup flour, divided 
1/2 teaspoon garlic powder
1/2 teaspoon onion powder
1/2 teaspoon creole seasoning
1/2 teaspoon dried thyme
1 teaspoon salt
1 teaspoon cracked black pepper
4, 6 oz cube steaks
1/2 cup cornstarch
3 eggs, loosely beaten
canola oil for frying
2 cups milk
salt and freshly ground pepper

Add garlic powder, onion powder, creole seasoning, thyme, salt and pepper to 1 cup flour.  Combine well.

Set up flouring station by putting cornstarch in one large bowl or plate, beaten egg in another, and the flour mixture in a third. Coat steaks in cornstarch, making sure it is totally covered.  Then dip in egg, and then in flour mixture. Repeat for all steaks.

In a large frying pan or cast iron skillet, pour enough oil in the pan to reach 1/4 inch up the sides.  When oil is hot, begin frying steaks.  You will probably have to do in two batches.  Fry 4 minutes on first side and flip.  Fry another 2-4 minutes on second side until golden brown and done. Drain on paper towel.  If desired, place in oven on a cookie sheet on keep warm until the gravy is ready.

When last batch of steak is done, add 1/4 cup flour to oil in pan and stir to form a roux (if there is too much oil in there, you can drain a little out before adding flour).  Once well combined, cook 2 minutes more and then start to slowly add milk.  Whisk as you add milk and make sure no lumps form.  Scrape up any bits on the bottom of the pan (this is where the flavor is!). Keep adding milk, a little at a time, continuing to stir. Once gravy is to desired consistency, add salt and more pepper to taste (it will initially be a little bland, so season well--add some of that creole seasoning, if you wish).  Top steaks with gravy and serve over mashed potatoes.  Enjoy!

Download PDF of Recipe

Wednesday, August 10, 2011

What's for Dinner? Fresh Tomato Sauce with Pancetta over Pappardelle!

Yesterday, when I made my gazpacho, I went ahead and prepped all the rest of my fresh, garden tomatoes for this sauce that I was making tonight.  It is such a simple, fresh sauce that tastes almost as good if you use a good quality, San Marzano canned tomatoes than if you use fresh tomatoes (but you didn't hear me say that!). If you use fresh tomatoes, you need to core them, cut an "x" in the bottom and drop them in boiling salted water.  Let them blanch for a few seconds (15-30) and remove from boiling water.  Let cool and peel off skin.

Now for the pasta.  I have discovered this dry pasta that I am in love with.  It is Cipriani Extra Thin Pappardelle and it is amazing.  It tastes ALMOST like fresh pasta.  Now, it is very pricey.  At the Teet, an 8 oz box is $7.99.  I KNOW!  It is expensive, but, in my eyes it is so worth it. When you think that it serves 4-5, that is less than $2 per serving of pasta.  You'd pay way more at a restaurant, and it is better! Ok, so enough about that.  If you can't stomach the price, fine...just use a regular old dried pasta.  Be that way.

I hope you make this sauce...with or without fresh tomatoes and with or without the best pasta ever!  :) It is such a simple, flavorful sauce--it has become a Sullivan house standard. Buon appetito!

Fresh Tomato Sauce with Pancetta
over
Pappardelle
Serves 4-5

1 TBSP olive oil
6 oz, pancetta, finely diced
1 medium onion, finely diced
3 cloves garlic, minced

2 lbs of fresh tomatoes, cored, blanched and peeled OR 1, 28 oz can San Marzano whole peeled tomatoes
1/2 teaspoon crushed red pepper
salt and pepper to taste
10 leaves fresh basil, rolled and cut in a chiffonade
8 oz Cipriani Pappardelle, or other dried pasta


In a large sauce pan over medium heat, add olive oil and saute pancetta for 5 minutes, until it starts to brown.  Add onion and saute until soft.  Add garlic and saute 1 minute more.  With your hands, squeeze tomatoes into the pan, breaking them up (do this whether using fresh or canned).  Add all sauce from fresh tomatoes or canned tomatoes.  Simmer for 10 minutes, further breaking up tomatoes to desired chunkiness with a wooden spoon. 

Boil pot of water and add pasta.  Cook to directions and drain.


Add red pepper to sauce and season with salt and pepper to taste.  Simmer 10 more minutes.  Right before serving, add fresh basil and stir. Serve over pasta and top with grated Parmesan or Romano cheese.  Enjoy!


Download PDF of Recipe


Tuesday, August 9, 2011

What's for Dinner? Gazpacho!

It has been over 100 degrees here (with the heat index) for over a month.  It's been brutal!  So, when thinking about dinner tonight, something light and cool sounded good.  We have a ton of tomatoes in the garden and gazpacho sounded perfect!

I have two friends that sent me gazpacho recipes the same week a while back, so I kind of combined the two and the result was fantastic!  My friend Erin sent me her recipe...something special she made her dad for Father's Day.  And my friend Holly also sent a recipe. That recipe was created by a wonderful private chef her and her husband, Bill, so generously hired when several of us came to visit them in Chicago.  We had an awesome meal, that was like 10 courses, and this gazpacho really stood out.  She also served it in these adorable little hollowed-out cucumber cups...but I will stick to serving it in a good old-fashioned bowl!

Garnish the soup with whatever accoutrements you like...the more the better (I served it with sour cream and avocado...and the avocado really made it!).  And when served with a big crusty piece of bread...YUM!  Enjoy and stay cool!

Gazpacho
Serves 6-8
  • 4 Roma tomatoes, blanched, peeled, seeded, and chopped
  • ½ cup good olive oil
  • 1/4 cup red wine or Sherry vinegar
  • 2 cups low sodium vegetable juice cocktail (like V8)
  • 1 cup diced, toasted or day old baguette
  • 2 English cucumbers, seeded, peeled and chopped
  • 1 red bell pepper, chopped
  • 1/2 red onion, chopped
  • 2-3 cloves garlic
  • 1 large handful cilantro
  • ½-1 jalapeno (seeded if you desire less spicy)
  • juice of half a lemon 
  • 2-3 tsp hot sauce (to taste)
  • Salt and pepper to taste  

In a food processor, combine oil, vinegar, and tomato juice.  Add all other ingredients and puree until smooth (you may have to do this in two batches and stir together).  Season to taste.  Chill for at least 2 hours. Serve with sour cream, avocado slices, croutons, boiled shrimp, chopped fresh cilantro, and/or fresh basil. 

    Thursday, August 4, 2011

    What's for Dinner? Chicken Roti!

    The beautiful British Virgin Islands
    In 2008 we took a wonderful trip to the British Virgin Islands with our good friends.  We rented an amazing house on Tortola and boated around the islands.  It was so fun and we discovered that pretty much everywhere we went to eat, they had this thing called Roti on the menu.  It turned out, that Roti is this delicious curried chicken or vegetable stew.  Most of the time, it was served wrapped in a sort of tortilla that was made from chickpea meal, and then topped with mango chutney.  The girls loved it so much, at least one of us ordered it every time we went out.  We got really excited once, near the beginning of our discovery of Roti, when one of the little hole-in-the-wall places we went declared that their roti was (insert Caribbean accent) "the best on the island, man". Well, we heard that at almost every other subsequent place we went!  Inside island joke, I guess. But, it was all good and I'm glad we discovered a new taste on that great trip.

    You want me to eat WHAT??
    I came up with this recipe when I got home, because I was craving that Roti!  The chickpea tortilla is impossible to recreate (especially for a non-baker like myself), so you can use any kind of flour tortilla you like, or I just serve it as a stew or sometimes put it in a pita pocket.  If you do try the "burrito" tortilla method and you are in to chutneys, buy a bottled one and spoon it over the top: the others in the group loved it (it just breaks my fruit and meat rule, so I passed on it!).  If you want to do a vegetarian version, omit the chicken and add cauliflower and chickpeas. I would love to tell you Finn ate his up, but that would not be the case.  Someday! 

    If you ever get a chance to go to the BVIs, GO!  It is a wonderful place and I can't wait to go back soon.  Enjoy your new taste of the islands!


    "Best on the Island" Chicken Roti
    Serves 4
    • 2-3 tablespoons olive oil
    • 1 large onion, diced
    • 2 carrots, diced or sliced
    • 3-5 cloves garlic, minced (depending on how much garlic you like!)
    • 3 chicken breasts, diced
    • 1 large or 2 medium potatoes, peeled and diced
    • 1 heaping tablespoon curry powder
    • a few dashes of habanero hot sauce, to taste (I found a great Caribbean Scotch Bonnet hot sauce in the hot sauce isle at our grocery store)
    • 1 teaspoon salt (omit if not using low sodium chicken broth!)
    • black pepper to taste
    • 2 cups chicken broth
    • flour tortillas or pitas
    • jarred mango chutney (optional)

    Heat half of the oil in large saucepan.  Saute onions and carrots until soft.  Add in garlic and cook for another minute.  Transfer to a bowl and set aside.  In same skillet, add rest of the oil and saute chicken and potatoes together until they are browned and chicken is cooked through.  Add onion mixture back in.  Add curry powder, salt, pepper and hot sauce.  Stir to coat.  Add chicken broth (should just about cover the contents, if not, add water until it does) and turn down heat.  Simmer until sauce thickens and potatoes are fully cooked, about 30-45 minutes.  Add more broth or water if it gets too thick. Take off heat and let sit about 5 minutes prior to serving, to let the sauce thicken more.  Spoon on tortilla or pita and top with chutney (if desired). ENJOY!  

    Tuesday, August 2, 2011

    What's for Sides? Spencer's Salsa!

    Our friend Spencer makes the best salsa.  Whenever we have get-togethers, someone always asks her to make it.  I got the recipe from her a while back and ever since, I have not purchased any store-bought salsa.  Her recipe is so easy and so yummy!  It takes like, 5 minutes to make...less time than walking down the salsa aisle in the store. You definitely have to try it.  You will be a convert, too!

    Tonight we had Taco Night and, of course, Spencer's salsa made an appearance.  I also found something new and tasty in the store.  I discovered this Frontera taco sauce (and no, I'm not getting paid to advertise this...I wish!). It is a sauce packet in the Mexican Aisle...the one I got was the Taco Skillet with Red Chile and Cumin.  I just added it to some lean ground beef (you can use turkey) and onion that I browned and simmered it for about 10 minutes.  Really good!  There is a whole line of these sauces (although my local store only had 2). It really was flavorful and made the tacos special. Give it a try and enjoy!


    Spencer's Salsa

    1 clove garlic, peeled
    1/2-1 jalapeno, seeded
    1 large handful fresh cilantro
    1/2 medium onion
    1 14 oz can fire roasted tomatoes, drained
    1 14-oz can tomatoes and green chilies (like Rotel), drained (use desired heat level)
    juice of 1/2 lime
    pinch of kosher salt
    grind of black pepper

    In a food processor, add garlic, jalapeno and cilantro and process until finely minced.  Add the remaining ingredients and pulse until desired consistency is reached.  Enjoy!

    Download PDF of Recipe

    Monday, August 1, 2011

    What's for Lunch? Bacony Egg Salad!


    I love it when my food cravings coincide with items I have in my fridge! I had a dozen hard-boiled eggs I needed to use, and when I came home from my workout today I was seriously craving egg salad (very weird, I know...guess I needed a protein fix!).  I remembered an egg salad that my friends Kelly and Molly made when we went out to visit them in Denver that was awesome.  The key ingredient was bacon--because bacon makes everything taste better, of course!  It is really easy to make and really tasty.  Put it on some great crusty bread with some garden-fresh tomatoes, and you have a delicious lunch.  Enjoy!

    Bacony Egg Salad
    Serves 4-6
    • 4 slices thick-cut bacon, cut into small pieces
    • 12 eggs, hard-boiled, peeled and coarsely chopped
    • 3 green onions, finely chopped
    • 1 TBSP white wine vinegar
    • 3 TBSP mayonnaise (I use light, olive oil mayonnaise)
    • 1-2 TBSP dijon mustard
    • pinch salt
    • a few grinds of black pepper

    In a hot skillet, cook bacon pieces until crispy.  Remove from pan with slotted spoon and let drain on paper towels. Set aside.

    In a bowl, combine eggs, bacon, onions, vinegar, mayo, mustard, salt and pepper. Carefully fold ingredients together...try not to mash up eggs too much.  Serve open face on baguette slices or on crusty bread as a sandwich and enjoy!

    Download PDF of Recipe

    Saturday, July 30, 2011

    What's for Apps? Shrimp Summer Rolls!

    Tonight we went to a cookout down on the Intracoastal at our friends Austin and Jenny's Club's dock. It was so fun and the breeze down on the water almost made us forget it was 100 degrees out!  I had to bring an app, and I wanted something that could be served at room temp and that was refreshing in the oppressive heat.  These came to mind.  I hadn't made them in a long time, but thought they were just the thing.  Now, these can be a little time consuming to do, but they are fun, and I suggest making them with a friend while drinking a glass (or two) of wine (advice I should have given myself before I started these). But in the end they are worth it because they are beautiful, delicious and seriously healthy.  Give them a try...they'll be the hit of the party!

    Shrimp Summer Rolls
    Makes 10 large rolls

    • 1 lb 30 count shrimp
    • 1/2 pkg vermicelli rice noodles (found in Asian aisle), soaked in hot water for 10 minutes and drained.
    • 1 package Vietnamese rice paper (you can find these at the Asian market or sometimes in the Asian aisle of the supermarket--do NOT use egg roll wrappers...they are not the same thing!)
    • 5 crab sticks, sliced in half lengthwise
    • 1/2 avocado, thinly sliced
    • 1/2 cucumber, seeded and julienned
    • 1 handful pre-shredded carrots
    • 1 pkg enoki mushrooms (optional)
    • 1/2 bunch green onion, chopped
    • 1 bunch mint, leaves stripped and roughly chopped.
    • 1 bunch cilantro, leaves stripped
    • sweet chili sauce (store bought--in the Asian aisle)
    • ginger soy sauce (recipe below)

    Fill medium pot with water, bring to a boil.  Salt water and add shrimp.  Cook for 2 minutes, or until pink and firm.  With a slotted spoon, remove shrimp into a colander and rinse.  Slice shrimp in half. Turn off heat on burner and add noodles.  Let soak 10 minutes until they become soft.  Drain and rinse.  Set aside.

    Line up all ingredients.  Fill shallow plate with warm to hot water. Cover another plate with a damp paper towel.  Dip rice paper in warm water and let sit for 10-20 seconds.  Make sure all areas are under water.  When soft (don't let sit too long--you don't want it soggy) carefully pick up rice paper and place on damp paper towel (if it gets wrinkled, don't panic! Just carefully smooth it out).  In the center of the rice paper, put 5 shrimp across, uncut side down.  Then layer all ingredients on top.  Fold side closest to you up over ingredients.  Fold sides in (like a burrito) and then tightly roll up until fully sealed.  Repeat with remaining rice papers and ingredients.  Do not stack the rolls, as they are very sticky! Slice in half and serve with dipping sauces.  Enjoy!

    Ginger Soy Dipping Sauce
    Add 2 TBSP soy sauce and 2 TBSP reduced sodium soy sauce (or you can do all one or the other) to a small bowl.  Add 1/2 tsp toasted sesame oil. Grate peeled ginger into the sauce (maybe 1/4 tsp).  Grate 1/2 clove garlic into the sauce.  Add 1/2 tsp sesame seeds. Whisk together and let sit to allow flavors to come together.

    Download PDF of Recipe

    Tuesday, July 26, 2011

    What's for Dinner? Summer Tomato "Pizza" Pie!

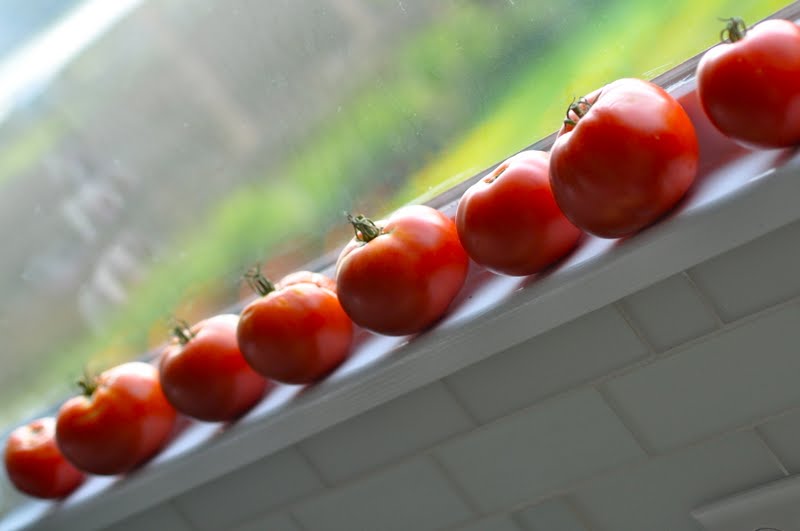
    Home grown tomatoes sunning themselves on our sill
    Man, I am worn out from this past week!  Finn was sick, turned one year old, we had BOTH sets of Grandparents in town and a big party on Saturday.  It was exhausting, but a lot of fun. We've been eating leftovers from the weekend for 2 days now (I had the party catered), so tonight, I wanted something else, and needed to use some of our garden tomatoes that were sunning in the window.  Some of the ladies at Sully's work were talking about this tomato pie recipe and I decided to try it.  I had all the ingredients on hand and seemed simple enough to do (as a general rule, I do NOT bake!). I adapted the recipe a bit, but it came out really good.  Sully said it tasted like a tomato pizza...hence the name.  If you have fresh tomatoes and basil, this is a great, simple dish to make...and it will impress your friends!  Enjoy!

    Summer Tomato "Pizza" Pie
    Serves 4
    • 1 refrigerated pie crust (or can use frozen already in pan)
    • 3-4 tomatoes, sliced (you can peel them first but isn’t a must)
    • kosher salt
    • 5 large basil leaves, rolled up and cut in a chiffonade
    • 3 sprigs fresh thyme
    • 3 green onions, chopped
    • ¾ cup shredded mozzarella
    • ¾ cup shredded cheddar
    • ½ cup mayonnaise (I use light Olive Oil Mayo)
    • pepper to taste

    Preheat oven to 450 degrees.  Roll pie dough on to 9-inch pie pan (spray with Pam) or put in a tart pan. If using pie pan, crimp edges of the crust so they look nice.  Prick bottom of crust with fork.  Prebake pie crust for about 12 minutes, until slightly golden (you may need to prick more halfway through, if you see the crust is rising up in the middle).  Lower oven temp to 350.  Set crust aside to cool.

    Pie before cheese mixture is added on
    Place sliced tomatoes in a colander.  Add a pinch of salt and let drain over sink for about 20 minutes to get a lot of the liquid out.

    In a small bowl, mash together the cheeses and the mayo until combined.

    In the pie pan or tart shell, layer tomatoes on the bottom.  Sprinkle with herbs and onion. Layer on the cheese mixture and spread evenly over top.  Add fresh ground pepper.

    Bake for 30 minutes.  Broil for about 2-4 minutes (watch it!) until the cheese is golden and bubbly on top.  Let sit for about 10 minutes and slice and serve!

    Wednesday, July 20, 2011

    What's for Dinner? Roasted Eggplant and Pepper Marinara over Spaghetti Squash!

    Ok, so we have more eggplant and peppers galore from the garden (holy cow, we are having a fantastic first attempt at a garden!) that we needed to use and I came across this recipe that looked really good.  We also had spaghetti squash from the garden as well.  Funny story...

    Back in the early 2000s, Sully and I did the South Beach Diet for several months.  We both lost a lot of weight, mostly because we didn't eat many carbs for that period of time.  A substitution for pasta, according to the South Beach way of life, was spaghetti squash.  I used to make it every so often, and liked it.  Flash forward to this spring.  We were planting the garden and Sully bought a spaghetti squash plant because he thought I really liked it (I like it ok, but it wasn't something I ever would have thought about growing).  Anyways, little did we both know, the spaghetti squash is an unruly plant that completely takes over.  It grew out into our yard, up our deck trellis and every other which way.  When it was all said and done, we had 4 large squash and a crazy, cracked-out plant we had to get rid of!  But, I digress...

    This recipe has a lot of steps, but I added some notes to make it a bit simpler, if you like.  You can't get away from roasting the eggplant, but you can buy jarred roasted peppers instead of doing it yourself.  This came out great and I did really like the spaghetti squash.  I didn't even miss real pasta (and I LOVE pasta).  But if you don't want to deal with the squash, by all means, use pasta!  I hope you try it, it's really good and doesn't get much healthier than this!  Enjoy (and beware of the man-eating vines, if you ever plant spaghetti squash)!

    Roasted Eggplant and Pepper Marinara over Spaghetti Squash
    Adapted from Rachael Ray
    Serves 4

    • 2 medium eggplants (or 4 thin, purple Japanese eggplant)
    • 1 spaghetti squash, sliced lengthwise and seeds removed
    • 1 red bell pepper (or 1-2 jarred roasted red peppers)
    • 2 red chile peppers , I used overripe Anaheims from the garden (or 2-3
    • jarred Piquillo peppers)
    • 1 head garlic
    • 1 sprig rosemary, minced
    • Olive oil
    • Salt and pepper
    • 1 carton sliced mushrooms
    • 1 cup chicken stock
    • 1 28-oz can whole, peeled San Marzano tomatoes, with juice
    • 8 basil leaves, chopped
    • 1 tsp dried oregano
    • grated Parmesan or Romano cheese  

    Preheat oven to 425.  Cut top off of garlic bulb and remove outer skin.  Place on a sheet of tinfoil.  Drizzle with olive oil and top with rosemary.  Fold foil around bulb to form packet and seal tightly.  Place in oven.  Total cook time with be about 45 minutes (while eggplant is roasting) or until garlic is soft and removes from skin easily. 

    Cut eggplants in half, lengthwise.  Brush cut side with olive oil and place, cut side down, on a baking sheet.  Roast for 30-45 minutes, until browned and very soft.  When done, set it and garlic aside and cool.

    If roasting your own peppers, brush all peppers with olive oil and broil for 3-4 minutes, until skin is charred, and turn with tongs until all sides have been well charred.  Remove from oven and let cool.

    Place spaghetti squash, cut sides down, on a microwavable plate.  Cover tightly with plastic wrap.  Microwave on high for 8-10 minutes, until flesh easily shreds with fork (be careful when unwrapping plastic...the steam is HOT).  Shred flesh of squash and put in serving bowl.

    While squash is cooking, in a large saucepan, add 1 TBSP olive oil.  Sauté mushrooms until brown.  Add chicken broth and tomatoes.  With a fork or hand potato masher, mash whole tomatoes so they break up a bit (watch out, sometimes they will spit at you!). Let simmer.

    While tomatoes are simmering, scoop flesh from eggplant and add to food processor or mini prep.  Remove skin, stems and seeds from peppers and add to processor.  Scoop garlic from skins and add to processor.  Process until smooth (or leave a little chunky, if you like).

    Add eggplant mixture to tomatoes.  Stir well.  Cook for another 10 minutes, until sauce starts to thicken. Add oregano, basil and salt and pepper to taste.

    Serve over sauce over spaghetti squash and top with grated Parmesan cheese.  Enjoy!


    Monday, July 18, 2011

    What's for Dinner? Smoked Chicken Pasta!

    Sorry, I've been slack on the postings!  Between planning for Finn's 1-Year Birthday (BOTH sets of grandparents are coming in town) and then having a sick baby boy, it's been busy around here!  So...I do the best I can!  :)

    Sunday, Sully engaged in one of his new favorite hobbies...smoking meat.  I got him a Weber smoker for our anniversary this year and he's enjoyed experimenting with it.  This weekend he smoked some chicken leg quarters (they were on special at the Teet for $.47 a pound!).  They came out really good...juicy inside and crispy skin on the outside.  We had leftovers, so I thought the smoked chicken would go well in pasta.  If you don't have a smoker, you can usually buy smoked chicken...Fresh Market has it in their rotisserie section.  You could use regular rotisserie chicken in this...just make sure to use the smoked mozzarella to add the smokiness that is so tasty in this pasta.  And, P.S., I highly recommend asking for a smoker for Christmas...it makes some amazing meat!  I hope you like it...GO MEAT!


    An array of delicious smoked meat
    Smoked Chicken Pasta
    Serves 6

    • 1 lb penne pasta
    • 2 ears fresh corn, kernels cut off the cob
    • 6 poblano or anaheim peppers
    • 2 TBSP plus 1 TSP butter (I used Brummel and Brown spread)
    • 2 TBSP flour
    • 1 cup skim milk
    • 2/3 cup light cream cheese
    • 1/2 cup grated Parmesan or Romano cheese
    • 3 smoked chicken quarters, skin removed and meat pulled from bone and shredded (about 2 cups)
    • 1 can Rotel, drained
    • 1 TBSP creole or blackening seasoning
    • salt and pepper to taste
    • 4 oz smoked mozzarella, cut in small cubes

    Cook pasta according to directions.

    Heat broiler in oven.  Place peppers on a baking sheet and spray with cooking spray.  Broil about 5 minutes on one side, or until skin starts to turn black and bubble.  Flip over.  Broil another 3 minutes on second side, until done.  Let cool.  Once cool, remove tops, skin and seeds.  Chop and reserve.

    In a medium skillet heat 1 TSP butter and saute corn until it begins to char.  Set aside.

    In a saucepan, heat butter until melted.  Stir in flour and combine to form a smooth paste.  Slowly add in milk and stir until sauce forms and thickens.  If too thick, add a little more milk.  Reduce heat and add cream cheese and Parmesan and stir until combined and smooth.

    Add cheese sauce to pasta and add seasonings.  Stir until combined.  Add chicken, peppers, tomatoes, corn and mozzarella.  Serve!

    ** This would also be good with black beans and/or crumbled bacon added in.

    Download PDF of Recipe

    Tuesday, July 12, 2011

    What's for Dinner? Chicken and Pepper Stirfry

    Tonight, after having spent all last week with my parents, I was feeling nostalgic and wanted to cook one of my mom's recipes from when we were growing up.  Back in the day, my mom was kind of your standard Baby Boomer Housewife cook...she made simple, quick dishes (including a lot of casseroles), but all were tasty!  This recipe was one of her more "adventurous" undertakings, as Asian food was not in her normal cooking repertoire.  I had some bell peppers (from the garden of course) that I needed to use and that made me think of this.  Ahhh, "memories...like the corners of my mind" (remember the scene with Tom Hanks in "Big", anyone?).  I hope you like it!  Enjoy!

    Chicken and Pepper Stirfry
    Serves 4

    • 1/2 cup soy sauce (can use regular, reduced sodium or a combo of both)
    • 2 TBSP cooking sherry
    • 1/2 tsp garlic powder
    • 1/4 tsp sugar
    • 1 tsp ground ginger
    • 3 TBSP cornstarch
    • 2 TBSP oil (olive or canola), divided
    • 3 chicken breasts (about a pound), cut into bite-size pieces
    • 3 bell peppers, cut in thin slices (use a combo of red and green)
    • 1 onion, cut in half and thinly sliced
    • 1 8 oz container sliced mushrooms
    • 3 cloves garlic, minced
    • 1 can sliced water chestnuts (optional)
    • 1 cup water
    • rice

    In a small bowl, combine soy sauce through cornstarch and mix well.  Set aside.

    Over high heat, saute chicken in large skillet and cook until brown and cooked through.  Reserve to bowl.  In same pan, add remaining oil and saute peppers, onions and mushrooms until soft, about 5 minutes.  Add garlic and water chestnuts, if using, and saute 1 minute more.

    Add reserved chicken back to the pan and add sauce.  Stir to combine and cook about 1 minute.  Add water and let mixture simmer and thicken, about 5 more minutes.  When all is combines and sauce is thick, serve over rice.

    Download PDF of Recipe

    Monday, July 11, 2011

    What's for Sides? Nan's Delicious Artichokes!

    We have lots of parties...it's what we like to do! A lot of the time we do kind of a pot-luck thing, where all of our friends bring food over and/or we cook together.  But sometimes we have parties that we do all the cooking.  At one of those parties, our annual Mardi Gras fete, my friend Nan came and brought me a little hostess gift.  She knows my love of food, so she brought a hand-written card of one of her favorite recipes, with some of the ingredients that go in it. It was such a cute idea and the recipe sounded great.  I FINALLY got around to making her dish last night, and wish I hadn't waited so long.  There's a reason she calls them her "delicious artichokes".  This was easy and really good!  All the flavors go perfectly together.  It's great as a side dish, and Sully and I thought it would be awesome as a stuffing for chicken, as well (just dice the artichokes up smaller).  Give it a try.  And next time you go to a party, try Nan's idea for a hostess gift...your friends will be grateful!  Enjoy!


    Nan's Delicious Artichokes
    Serves 4-6

    • 4 TBSP olive oil, divided
    • 4 anchovy fillets (don't be afraid, when cooked here, they taste nutty, not at all fishy!)
    • 3 cloves garlic
    • 1/4 teaspoon crushed red pepper flakes
    • 1 TBSP capers
    • 4 oz fresh bread crumbs (take the extra time to throw some old bread in the food processor, it's worth it)
    • 3 TBSP toasted pine nuts (throw them in the toaster oven for a few minutes...be sure not to burn!)
    • 2 pkgs frozen artichoke hearts, thawed (or 3 pkgs of the fresh pack ones in the produce section at stores like the Fresh Market)
    • 3 TBSP fresh parsley, minced
    • salt and pepper to taste

    Heat 3 TBSP olive oil in a medium saucepan over medium low heat and add anchovies.  Saute until anchovies melt into oil.  Add garlic and cook for 1 minute. Add the red pepper flakes, capers and breadcrumbs.  Stir and keep on heat until bread is toasted, crispy and golden brown. Add pine nuts, salt, and pepper (be careful, anchovies are salty, so taste before you add more salt). Pour mixture into bowl and set aside.  Add additional TBSP oil and saute artichokes until they take on a bit of color and are tender.  Add reserved breadcrumb mixture and the parsley.  If you want, sprinkle with some Parmesan cheese. Serve!

    Download PDF of Recipe

    Thursday, July 7, 2011

    What's for Dinner? Flounder Florentine!

    After our heavier Pad Thai last night, I wanted something a littler lighter this evening.  My mom and I went to Fresh Market and (amid a complete Finn meltdown) found some great looking flounder.  It was actually called Turbot Flounder.  I had to look that up, because I had heard of Turbot, but didn't know it was a flounder.

    So [quick flounder lesson], the Turbot Flounder or European Flounder is mostly found in Europe in the White, Black and Mediterranean Seas and was introduced to Canada and the USA by accident in ballast water on ships.  The Turbot Flounder I got at the Fresh Market today was from Canada.  The flounder we usually get here in the South is Southern Flounder.  There are also Summer Flounder and Winter Flounder in the Western Atlantic and Olive Flounder of the coast of Japan.  Now, you can go brag about your flounder knowledge to all of your friends.

    I have this easy recipe that is really good.  You can do it with Flounder, Sole, Halibut or Grouper...pretty much any kind of mild white fish (not too thick or steak-y).  I served it with mashed potatoes and more sauteed garden zucchini.  Sorry guys, no photo for this tonight.  I don't have my usual setup since I'm not at home and the photos I took just don't look too appetizing...I couldn't do it to you!  Next time I make it I will update this entry.  It may not look good in photos, but give it a try...it's simple and really tasty!  Enjoy!

    Flounder Florentine
    Serves 2

    • 1/4 cup grated Parmesan cheese
    • 2 TBSP butter, melted
    • 1 TBSP mayonnaise
    • 3 green onions, sliced (whites and greens)
    • 2, 5 oz bags baby spinach (or you can use 1, but it cooks down a lot)
    • 2 cloves garlic, minced
    • 1/2 lemon, juiced
    • 1 lb flounder fillet(s)
    • salt and pepper to taste

    In a small bowl, mix together Parm, butter, mayo and the white and half of the greens of the scallion.  Set aside.

    Spray a 9x13 casserole with cooking spray and layer spinach on the bottom.  Sprinkle garlic over top.  Lay flounder fillet(s) over spinach and squeeze lemon juice on top.  Brush on sauce mixture and sprinkle with salt and pepper. Bake at 375 degrees for 10-15 minutes, depending on how thin your fish is (if not done, keep cooking until it is, but don't overdo...you don't want mushy fish)! Top with the remaining green onions and serve with rice or mashed potatoes.  Enjoy!

    Download PDF of Recipe

    Wednesday, July 6, 2011

    What's for Dinner? Pad Thai!

    This week I'm back home visiting with my parents in Apex (the Peak of Good Living).  My uncle is also up from Miami and he inspired me to make Pad Thai tonight.  (And yes, I might be the only person in the world that goes home and cooks for my parents, instead of my parents cooking for me...ha!) He was in the Air Force and stationed in Thailand during Vietnam in the late sixties, so needless to say, he knows good Thai food--I had a lot to live up to!  When researching recipes, I found that a lot of them call for some unique ingredients like cane sugar and tamarind paste.  I tried to keep it to ingredients you can buy in a normal grocery store.  I also wanted to make it healthier, since a lot of the Thai places use a ton of oil.  I think the flavor came out great and I didn't miss the extra oil.  My uncle had two big servings, and even my Mom, who declared earlier in the day that she didn't like Pad Thai, said she loved it.  On a side note, Dad loved it as well, but wished there was tofu in it.  Sorry, Dad, keep dreaming.  Enjoy!


    Pad Thai
    Serves 4-5

    1 lb rice noodles
    1/4 cup light soy sauce
    1/4 cup fish sauce
    3 TBSP brown sugar
    2 limes, one juiced and one cut into wedges for garnish
    1 TBSP toasted sesame oil
    2 TBSP peanut or canola oil, divided
    3 eggs, scrambled
    3 chicken breasts, cut into bite size pieces
    3 cloves garlic, minced
    1 bunch green onion, sliced diagonally in 1/2 inch pieces (green and whites)
    1 large handful mung bean sprouts
    1 large handful pre-shredded carrots
    1 large handful cilantro, chopped
    1/3 cup peanuts, coarsely chopped
    Sriracha hot sauce

    Place the rice noodles in a bowl and cover with very hot tap water.  Let sit for 30 minutes until soft (they will still be a bit al dente, you don't want them to get soggy).

    In another small bowl, stir together 1 TBSP canola/peanut oil, soy sauce, fish sauce, brown sugar and sesame oil.  Whisk until well combined.  Set aside.

    Heat remaining oil on high in large wok or skillet, and add chicken.  Saute until brown and cooked through. Reduce heat to medium high and add garlic, white and half of green parts of onion and carrots and saute for about 1-2 minutes.  Add sauce and noodles. Thoroughly toss together and cook for about 5-10 minutes, continuously tossing.  Once noodles are soft, move some of the noodles over to the edge to make an opening in the bottom of the pan.  Pour in eggs and let them cook.  Start scraping them up and continue until they are scrambled.  Once they are fully cooked, add bean sprouts toss with the egg and pasta and make sure everything is well combined.  Remove from heat and add to serving bowl.  Top with the rest of the green onion, cilantro and chopped peanuts.  Add Sriracha hot sauce to taste for some heat.

    Download PDF of Recipe

    Monday, July 4, 2011

    What's for Apps? Lobster Roll Crostini!

    We had a great July 4th weekend...lots of friends, fun, family and even more FOOD!  Yesterday we had a cookout with our Wilmington crew, and as usual, we had sooo much food.  Everything was delicious.  We had shrimp tempura rolls, sausage and cheese stuffed jalapenos, homemade pimento cheese, tomato and feta bruschetta and buffalo chicken dip.  And that was just the appetizers!  My addition to the spread was a "lobster roll" crostini.  I've been up to the Northeast and had their famous lobster rolls before...big pieces of lobster tossed with mayo and celery and spices, then put on a buttered roll.  I wanted to make an appetizer version of this so I thought crostini would be perfect.  I buttered and grilled the baguette slices, so they had a little bit of a smoky flavor.  It was really easy to make and they turned out great...I just wish I had made more!  But with all the other awesome food...we definitely did NOT go hungry.  Overall it was a great weekend and it made me even happier than usual to live in this great country.  Happy 4th everyone!


    Lobster Roll Crostini
    Makes ~20 Crostini

    • 6 medium lobster tails
    •  kosher salt
    • 1/3 cup mayonnaise
    • 1/4 cup finely chopped celery
    • 1/4 cup finely chopped onion
    • 1/4 cup (loosely packed) chopped celery leaves
    • 1/4 teaspoon celery salt
    • 1 baguette, sliced on the bias into 1/2" slices
    • 1/4 stick butter, melted

    In a large pot of boiling water, add the lobster tails and salt generously.  Cook for 8 minutes until they turn red and tails curl.  Remove from water and set aside to cool.

    In a bowl, combine the mayo, celery, onion, celery leaves and celery salt.  Once lobster cools, remove meat from shells and coarsely chop.  Add to mayo mixture. Refrigerate for several hours.

    Butter one side of baguette slices.  On low heat, place bread, butter side down and grill until golden (and grill marks appear on bread).  Flip and keep on heat briefly.  Remove to platter and top with lobster mixture.  Add more celery leaves for garnish, if desired.  Enjoy!

    Download PDF of Recipe